

How long should new plaster dry before painting?
Use the plaster and paint manufacturers’ instructions together.
Written by Ali Vahidi · 5 min read
How long should new plaster dry before painting?
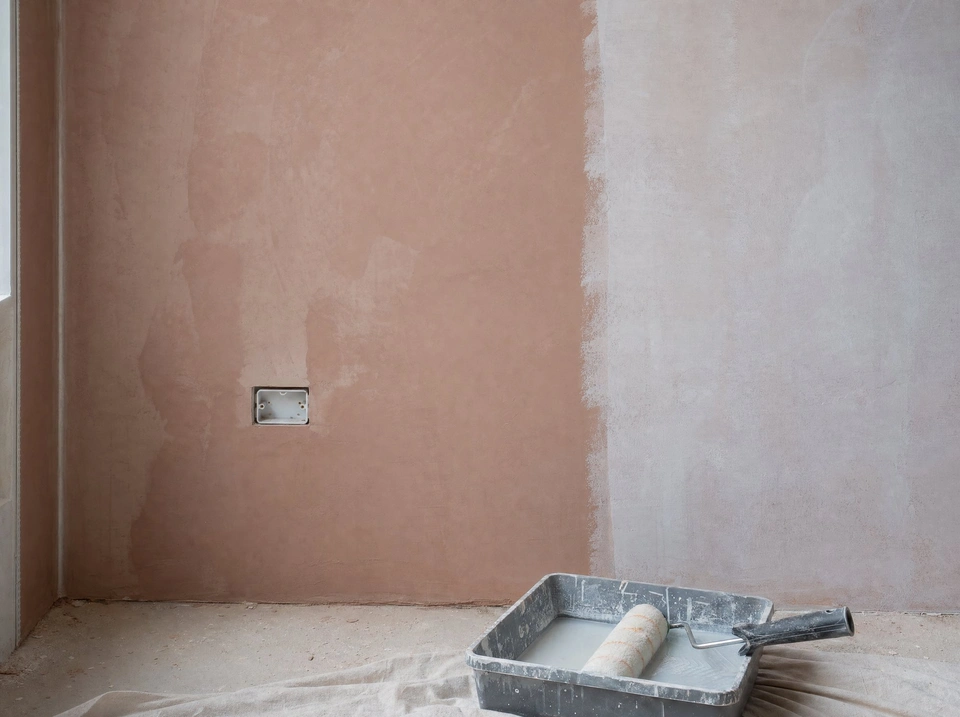
Use the plaster and paint manufacturers’ instructions together. Drying depends on thickness, ventilation and the room conditions. Check the whole surface, especially corners and deeper repairs, before specifying the first coat. A dry-looking patch at the centre of the wall does not establish that the whole room is ready.
Map old and new plaster separately
On a room plan, mark full newly plastered walls, deep repairs, thin skimmed sections and untouched existing finishes. Even on one wall, a deep chase filled after electrical work may behave differently from a thin skim at the far end. Check corners and the return behind the door. Note when each repair was completed. This makes a conversation with the plasterer and paint supplier more useful than relying on a single date for the entire room.
Look at the whole surface
View the wall in daylight from more than one direction. Differences in colour can help identify areas that deserve attention, but colour alone does not prove the surface is ready. Compare the thickest repair with a representative section elsewhere. Ask about any marks that repeatedly darken. A leak or continuing moisture needs investigation before decoration, even if the rest of the room looks ready.
Specify the first coating
Use the instructions for the actual plaster substrate and paint product. A generic dilution ratio copied from another product can give an unsuitable first coat. Record the proposed product, preparation and any manufacturer-specified dilution in the room schedule. Check whether the specification changes where new plaster meets old paint. Test a representative transition so differences in absorbency do not first become apparent after the whole wall has been finished.
Allow time for a sample
A small sample lets you judge the colour and the behaviour of the coating on a representative prepared surface. Check it under the light used at night as well as in daylight. Do not use a test patch as proof that a deeper repair elsewhere is ready. Plan for the final inspection after the coating has dried sufficiently to judge its appearance. Write down any area that has to be deferred so it is not accidentally included in the next coat.
A room with several drying histories
Picture an existing bedroom with a newly skimmed ceiling, a filled cable chase and two walls in old sound paint. Draw those as four separate surfaces on the room sheet. The existing painted wall may be ready for a colour sample while the deeper repair is still drying. A sample on that existing wall can help select a shade but tells you little about adhesion on the new work. Record who supplied the plaster and when each repair was completed. Ask for their finishing instructions and the paint manufacturer's instructions for that substrate. Agree a review date instead of tying the first coat to the date the plasterer left.
What to inspect after the first coat
Keep the first inspection in daylight and look along the surface as well as straight at it. The initial coating can expose fine ridges, scratches or a slight step where the new skim meets old work. Circle their positions on a photograph. Agree which require attention and how repaired patches will be brought back into the coating system before the next full coat. If a discoloured patch returns in the same place, pause to identify its source rather than repeatedly covering it. At handover keep the specification for the base coat as well as the finish. An isolated repair later may expose the underlying plaster again.
Compare products on a pair of boards
Prime two matching pieces of sample material in a way suitable for the intended surface. Apply the candidate products according to their instructions and label the backs with the product as well as the colour. Hold them side by side at the landing window and at the darkest point in the hall. Then rotate each board. A surface that looks identical head-on may show a noticeably different reflection when lit from the side. Once the specified cure time has passed, follow the recommended cleaning method on half of each board. Inspect it again in side light to see whether cleaning changes its appearance.
Write a finish schedule that survives a touch-up
A schedule entry such as “white trim” is too broad when there are several whites and two sheen levels in the house. Use a separate line for the landing skirting, door leaves, architraves and handrail if their product or preparation differs. Record the maker, range, shade, base and sheen as printed on the label. For the wall beside the handrail, include how far the finish runs around the corner. Keep a photograph of the junction. Later, if an isolated touch-up leaves a noticeable patch, that record helps decide which natural break to use for recoating and where a different product begins.
Look at reflected light
Stand near a window and look along a wall rather than straight at it. Reflected light makes raised repairs, roller texture and brush marks more visible. A flatter finish reduces the strength of those reflections but does not remove the underlying defect. Decide how much preparation the wall needs before using a lower sheen to soften its appearance. Inspect a sample once it has dried according to the product guidance.
Match the surface to its use
A ceiling above a quiet bedroom, a stair wall touched every day and a painted window board have different requirements. For each surface, note how often it will be touched, wiped or exposed to condensation. Then compare exact product specifications. The words matt, eggshell and satin refer primarily to appearance; two products with the same sheen description can offer different resistance to cleaning.
Choose wall and trim finishes together
Use two sample boards where the wall meets the skirting or frame. The same colour can appear subtly different in different finishes, especially in a dark hallway. A contrast can help an ornate profile stand out, while matching the shade can make joinery feel part of the wall. Compare the samples upright under the room’s evening lamps. Keep a record of both products, not just the common colour name.
Plaster preparation record
| Part of the room | What to establish |
|---|---|
| New skim | Plaster type, completion date and drying guidance |
| Filled chase | Depth of repair and whether it is ready for its coating system |
| Existing wall | Previous finish and how the boundary will be prepared |
Further reading: Dulux guide to painting new plaster.
 The 8 most popular front door colours in Manchester
 When is it too wet or cold to paint outside?